A cartridge heater that stops heating is not always ready for disposal: moisture, contamination, a poor bore fit, or a failed control component can produce similar symptoms. You will be able to isolate the circuit, test the heater against its original specification, decide whether recovery is safe, and select a replacement that will not repeat the failure.
Key takeaways
- Record voltage, wattage, diameter and heated length before removal.
- Test resistance, insulation and supply voltage before replacing the heater.
- Recover a cartridge heater only when it can be removed without damaging the bore.
- Match wattage, sheath, leads and heated length to the application.
How to isolate, remove and inspect a cartridge heater safely
Record the heater’s nameplate data before touching it: voltage, wattage, diameter, heated length, lead construction and sheath material. A correct wattage with the wrong heated length can create a hot spot in a die or mould, so photograph the installation and note the terminal positions.
1. Identify the actual supply arrangement—phase-to-neutral, phase-to-phase or three-phase control—and switch off the isolator, control circuit and upstream supply. Apply lockout/tagout, then verify zero voltage with a rated meter; do not assume the heater runs at 230 V.
2. Allow the die, mould, tank or machine to cool to a safe handling temperature. Disconnect and label each lead, keeping the heater electrically separate from the SSR, contactor, controller and sensor wiring.
3. Loosen retaining hardware and withdraw the cartridge straight along its bore. Stop if it is seized, swollen or dragging; levering against the die can damage the bore and turn a heater fault into a tooling repair.
4. Inspect the removed heater for sheath swelling, oxidation, arcing marks, crushed leads and terminal discoloration. Inspect the bore for scale, debris, moisture and scoring, then photograph both parts.
5. Measure cold resistance between the leads with a calibrated multimeter and insulation resistance from each lead to the sheath with an insulation-resistance tester at the heater maker’s specified test voltage. Record both results; the acceptable insulation limit depends on the manufacturer and test conditions.
Clean and dry a sound bore, then reseat the heater without force. Retain the readings, operating temperature, failure location and controller history for cartridge heater maintenance in Pune.
Which electrical tests separate a failed heater from a control fault?
A cold-resistance test separates an open or shorted cartridge from a control fault, while an insulation-resistance test reveals leakage to the sheath. For cartridge heater maintenance in Pune, disconnect both heater leads, confirm zero voltage, and record the nameplate voltage and wattage before testing.
Measure resistance between the leads with a calibrated multimeter. Compare the reading with R = V²/P, allowing for the element’s temperature coefficient and meter accuracy. Test phase-to-neutral or phase-to-phase as the machine is actually wired; do not assume a 230 V supply. Applying the wrong voltage changes resistive heat output approximately by P₂/P₁ = (V₂/V₁)².
Use a calibrated insulation-resistance tester from each power lead to the metal sheath, at the heater maker’s specified test voltage. Accept the result only against the manufacturer’s stated limit and test conditions; there is no universal megohm threshold. Never megger through an SSR, PID controller, thermocouple, or other connected electronics.
| Test result | Likely finding | Next check |
|---|---|---|
| No continuity between leads | Open element, broken lead, or terminal failure | Inspect leads and terminals; replace if the element is open |
| Resistance far below R = V²/P | Shorted element or incorrect wiring | Confirm circuit arrangement and heater rating |
| Correct cold resistance; low insulation resistance | Moisture ingress or sheath damage | Dry only under an approved procedure; replace if leakage persists |
| Both readings pass; no heating | SSR, contactor, fuse, wiring, sensor, or controller fault | Check commanded output voltage at the disconnected heater terminals |
Record every reading, the failure location, and photographs for recurring faults.
When cartridge heater recovery is possible—and when removal becomes risky
Cleaning, drying and reseating can restore cartridge heater operation when moisture has lowered insulation resistance without damaging the element or sheath. Disconnect and remove the heater, clean the bore and heater surface, then use controlled drying or a manufacturer-approved bake-out. Retest insulation resistance after the heater has cooled before reconnecting power.
Do not attempt cartridge heater recovery when you find:
- A cracked or punctured sheath
- A swollen body that will not enter the bore freely
- An exposed heating element or damaged terminals
- Insulation resistance that remains low after drying
- An open circuit, shorted element or burnt lead connection
A seized cartridge needs patience, not more force. Confirm isolation and complete cool-down, protect the leads, and pull the heater straight with a suitable extraction tool. Do not hammer the terminals, twist the leads, or lever against the die.
If the heater does not move, stop and send the assembly for controlled extraction; forcing it can tear the bore or leave the heater lodged inside.
Inspect the bore for burrs, scoring, ovality, contamination and looseness. A damaged or oversized bore prevents proper heat transfer and creates hot spots, so repair or replace the die before fitting another heater. Do not force a swollen replacement into it.
After reseating, verify insertion depth, sensor position, wiring, controller output, SSR or contactor operation, and over-temperature protection. Record photographs, bore condition, resistance and insulation-resistance readings with the failure location.
How to specify an industrial cartridge heater replacement in Pune
Record the removed heater’s nameplate and measurements before ordering an industrial cartridge heater replacement. Match diameter, total length, heated length, cold-zone length, lead length, lead insulation and exit position; a correct wattage with the wrong heated length can create a hot spot in a die or mould.
- Match voltage and wattage, then calculate expected cold resistance with R = V²/P. Compare the result with the measured resistance, allowing for temperature coefficient and meter accuracy.
- Specify sheath alloy, allowable watt density, terminal construction and moisture-resistant sealing.
- Record the bore diameter, straightness, depth, fit condition and any seized or enlarged section.
- Identify the circuit: phase-to-neutral, phase-to-phase or three-phase control through an SSR or contactor.
- Confirm thermocouple type, sensor position, controller output, over-temperature trip and supply frequency.
| Item | Record or match | Failure if ignored |
|---|---|---|
| Diameter and bore | Heater diameter, bore size and fit | Poor contact creates overheating or seizure |
| Heated and cold length | Active zone and unheated lead-side zone | Local hot spots or cold mould areas |
| Voltage and wattage | Nameplate values and circuit voltage | Incorrect heat output; power changes approximately with voltage squared |
| Sheath and leads | Alloy, insulation, exit direction and length | Corrosion, short circuits or installation damage |
| Machine circuit | Phase connection, SSR, fuse and controller | A sound heater receives no power or excessive voltage |
Give an industrial electrical heater supplier in Pune the photographs, failure location, insulation resistance, bore condition and controller-fault history. Saket Enterprises 08048052723 can use those details to distinguish a custom replacement from a physically similar but electrically wrong heater.
Related products
 | High Density Cartridge Heater Product Details: Power(Watts) As per customer requirement Voltage As per customer requirement Fostered with a team of highly qualified professionals,... View product → |
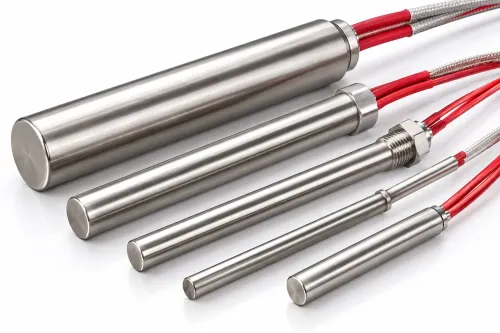
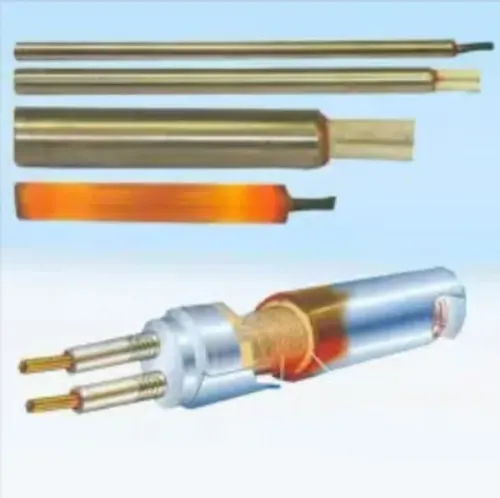
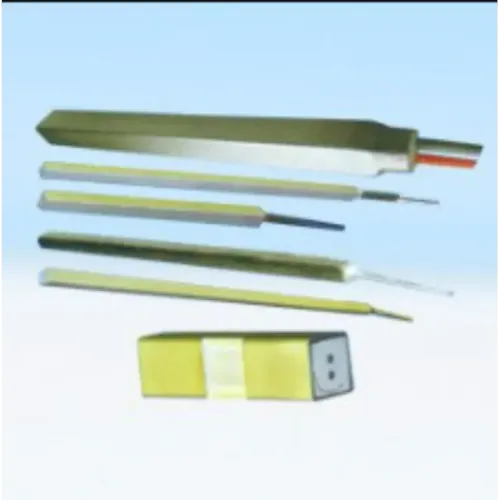
 | CARTRIDGE HEATERS * Cartridge Heater is manufactured in SS, Brass pipes with high purity MGO (Magnesium oxide powder ),high quality in chrome wire. View product → |
How to prevent repeated cartridge-heater failures in dies, moulds and tanks
Recurring failures become traceable when each removed cartridge is treated as evidence, not scrap. Before removal, record rated voltage, wattage, diameter, heated length, lead construction and sheath material. The replacement may match wattage yet fail again if its heated length creates a hot spot in a die or mould.
Keep one maintenance record containing:
- Cold resistance between leads and insulation resistance from each lead to the sheath, with tester voltage and the manufacturer’s acceptance limit
- Operating temperature, heating-cycle duration, actual supply arrangement and controller output
- Failure location, insertion depth, bore diameter, burrs, scale, contamination, moisture and whether the hole is partially blind
- Sheath swelling, oxidation, arcing and lead damage, supported by photographs
- SSR, contactor, thermocouple, PID, fuse and controller fault history
Use the pattern, not one reading, to identify the cause.
| Evidence pattern | Likely cause | Record or check |
|---|---|---|
| Low insulation resistance after heating | Moisture ingress or sheath damage | Drying history and repeat insulation test |
| Repeated failure at one bore location | Loose fit, burr, scale or poor heat transfer | Bore measurement and photographs |
| Correct resistance but overheating | Wrong voltage, control fault or excessive cycle | Phase-to-neutral/phase-to-phase voltage and controller log |
| Different wattages installed | Incorrect replacement specification | Nameplate and purchase records |
For industrial electrical heaters for cartridge heater maintenance in Pune, compare every failure against the original design record. Do not apply anti-seize automatically; contamination and reduced heat transfer can create another failure. A trend across several heaters warrants bore correction or control repair, not another replacement.
Frequently asked questions
How do you isolate and inspect a cartridge heater safely?
Switch off and lock out the electrical supply, verify zero voltage, allow the heater and surrounding metal to cool, then photograph the wiring and record the nameplate data before removal. Inspect the leads, terminals, sheath, bore and any signs of moisture, arcing or seizure.
Which electrical tests distinguish a failed cartridge heater from a control fault?
Measure resistance across the heater terminals and compare it with the expected value from voltage squared divided by wattage. Test insulation resistance between each terminal and the sheath, then check supply voltage, contactor operation, fuse condition and controller output.
When is cartridge heater recovery possible?
Recovery is practical when the heater tests correctly, the leads and sheath are undamaged, and it can be removed without scoring or enlarging the bore. Stop if the heater is swollen, seized, electrically unsafe or bonded to the die or mould.
How should you specify an industrial cartridge heater replacement in Pune?
Provide voltage, wattage, outside diameter, heated length, total length, sheath material, lead exit, lead length, terminal style, operating temperature and application details. Include photographs and the bore dimensions so the replacement matches the installation.
Related product
 | Low and Medium Watt Density Cartridge Heater Low and Medium Watt Density Cartridge Heater Product Details: Power(Watts) As per customer requirement Voltage As per customer requirement We are the well-known manufacturer and supplier of the... View product → |
Keywords